DIY sac à bouteille en toile de jute
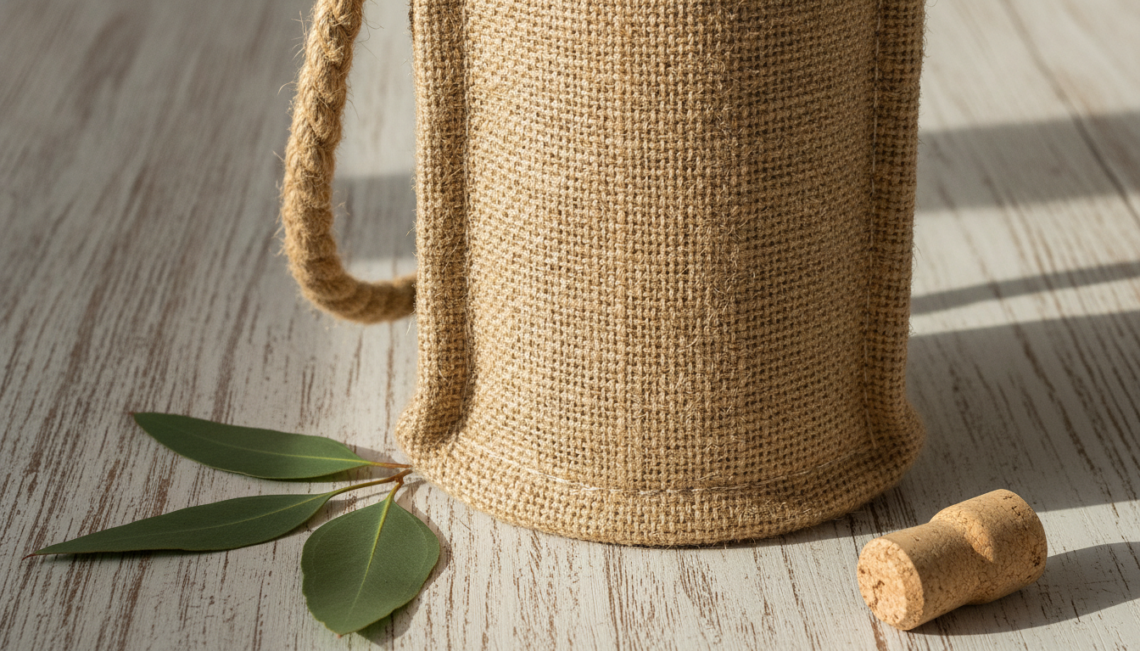
Le charme discret des matériaux bruts s’invite avec grâce dans notre quotidien à travers des projets DIY toujours plus inspirants. Le sac à bouteille en toile de jute, à la fois rustique et élégant, est une création qui mêle savoir-faire artisanal et démarche éco-responsable. Son authenticité se révèle dans le tissage naturel des fibres, racontant une histoire de matière noble et recyclable, parfaite pour accueillir des flacons précieux ou offrir un cadeau personnalisé empreint de sens. Fabriquer un sac à bouteille en toile de jute devient alors un véritable poème textile, une invitation à ralentir et à s’ancrer dans une vie plus douce et durable.
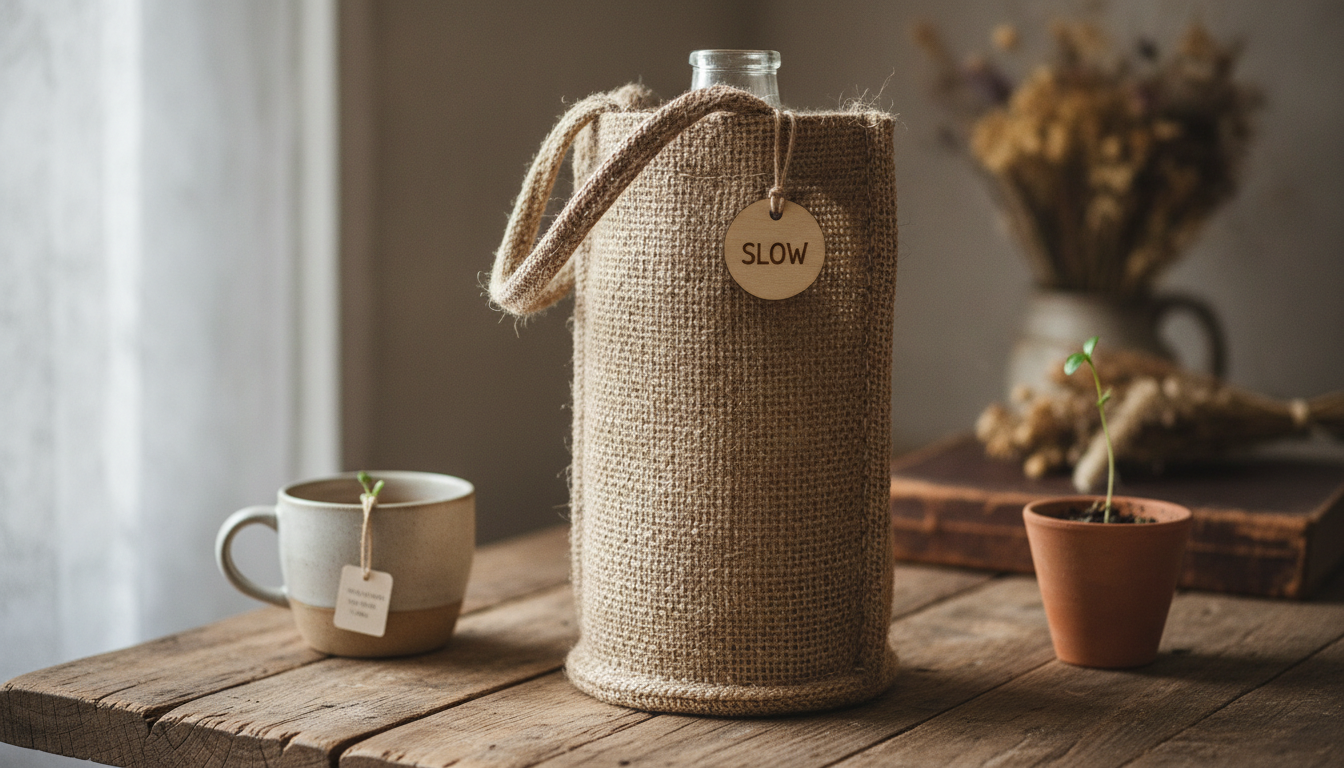
Cette tendance, profondément ancrée dans le mouvement slow living, pose un regard tendre sur l’objet utilitaire en lui insufflant une vie nouvelle, où chaque couture raconte l’attention portée au recyclage et à la valorisation des matériaux. En conjuguant art du bricolage, passion pour la couture et respect de la planète, le DIY devient une aventure intime et créative. Le sac à bouteille en toile de jute n’est plus un simple accessoire, il devient un témoignage d’un mode de vie où l’écologie et l’esthétique s’entremêlent délicatement.
Les trésors écologiques de la toile de jute pour un artisanat durable
La toile de jute, héritière d’une tradition ancienne, est une fibre naturelle reconnue pour ses qualités écologiques inégalées. Cultivée principalement dans les régions tropicales, elle est biodégradable et renouvelable, offrant une alternative précieuse aux textiles synthétiques qui envahissent nos modes de consommation. Ce choix naturel s’impose comme une évidence pour qui cherche à conjuguer DIY et respect de l’environnement. La robustesse du jute permet de créer des pièces durables tout en favorisant la réduction des déchets par son aptitude à être recyclé et transformé.
Réutiliser la toile de jute, notamment issue de sacs de café ou d’emballages variés, propose une démarche doublement vertueuse : elle prolonge la vie de matériaux déjà produits et limite l’extraction de nouvelles ressources. Cette fibre brute, au toucher rugueux et à l’odeur boisée, invite à une approche sensorielle et artisanale, rappelant le savoir-faire d’antan transmis avec douceur. Coudre un sac à bouteille en toile de jute, c’est entrer dans une harmonie entre matière et technique, où chaque point de couture renforce le lien avec une production responsable.
Les atouts pratiques et écologiques du jute
Le jute se distingue par sa capacité à résister au poids d’une bouteille tout en restant léger et aéré. Cette toile laisse respirer le contenu et offre une protection naturelle contre les chocs. En comparaison aux sacs plastiques ou synthétiques, elle évite la pollution microplastique tout en apportant une esthétique rustique, apaisante, souvent recherchée dans les intérieurs slow living.
Voici un aperçu des principaux avantages de la toile de jute :
- 100 % naturelle et biodégradable : elle se décompose rapidement sans nuire à la terre.
- Résistance adaptée : idéale pour soutenir des bouteilles, grâce à sa texture solide.
- Facilité de recyclage : la toile peut être réutilisée pour d’autres projets ou compostée.
- Esthétisme intemporel : son aspect naturel se prête à une personnalisation simple et élégante.
- Soutien aux petits producteurs : souvent issue de filières artisanales dans les pays producteurs.
Se lancer dans un projet DIY avec de la toile de jute, c’est aussi participer à une chaîne d’artisanat respectueuse des hommes, de la nature et du temps. Une invitation précieuse en 2026, où chaque geste compte pour préserver un monde plus doux.
La fabrication maison d’un sac à bouteille en toile de jute : étapes et astuces
Réaliser un sac à bouteille en toile de jute chez soi allie simplicité et plaisir créatif. Le matériel nécessaire se limite généralement à quelques fournitures accessibles et à une patience douce, idéale pour apaiser l’esprit. Préparer un patron ou reproduire un gabarit à partir d’un vieux sac permet de se lancer avec assurance.
Pour confectionner ce sac, il te faudra :
- Un morceau de toile de jute d’environ 40 x 50 cm
- Un tissu de coton recyclé pour la doublure (environ 40 x 50 cm)
- Fil épais ou ficelle naturelle pour les anses
- Aiguilles, ciseaux, épingles
- Une machine à coudre ou du fil et une aiguille pour une couture manuelle
Étapes détaillées de la couture
Commence par plier la toile de jute en deux, endroit contre endroit, afin de former la structure du sac. Épingle les côtés et la base, puis couds-les à environ un centimètre du bord. Le choix d’une couture solide est essentiel pour garantir la durabilité.
Insère ensuite la doublure en coton à l’intérieur pour protéger la bouteille et renforcer l’ensemble. Cette étape améliore le confort d’utilisation et prolonge la vie du sac en évitant que les fibres de jute ne s’effilochent ou ne blessent les mains.
La touche finale réside dans la création des anses. Pour un sac à bouteille pratique, deux longues anses en ficelle ou en tissu permettent de le porter facilement à l’épaule ou à la main. Fixe-les solidement à la couture supérieure avec plusieurs points de renfort.
Une ouverture peut être agrémentée d’un système de fermeture simple : un lien coulissant en cordelette de jute ou un bouton en bois, accentuant ainsi le côté naturel et soigné du sac. Ce petit détail ajoute une poésie à l’objet fini.
Les astuces pour bien travailler la toile :
- Utiliser un pied-de-biche spécial pour tissus épais si tu couds à la machine.
- Bien repasser la toile avant de coudre pour éviter les plis.
- Faire des surpiqûres pour renforcer la solidité.
- Varier les textures en associant le jute à du lin ou du coton bio.
- Intégrer un fond légèrement rigide grâce à un carton recyclé recouvert de tissu.
Ce sac, modulable et personnalisable, devient alors un compagnon fidèle lors de tes sorties ou une idée de cadeau personnalisé qui porte le sceau d’un savoir-faire tout en délicatesse.
Personnaliser ton sac à bouteille en toile de jute : idées créatives et inspirations
La toile de jute, par sa texture brute, offre un merveilleux terrain pour la personnalisation. Que tu souhaites embellir ton sac avec des motifs peints, brodés ou imprimés, chaque approche raconte une touche unique, un souffle créatif qui s’imprime dans la matière. Peindre un motif géométrique sur la toile permet d’introduire un univers graphique et contemporain, renforçant son attrait esthétique tout en respectant son essence naturelle.
Une autre méthode consiste à ajouter des broderies délicates à la main. Des feuilles, des fleurs ou même des phrases inspirantes peuvent s’inscrire en fil de coton coloré, donnant à cet objet une dimension poétique et singulière. Le recours aux tampons ou à la sérigraphie pour inscrire un logo, un nom ou un symbole personnalisé, confère en outre au sac une vocation promotionnelle pour des petites entreprises soucieuses d’éco-responsabilité.
Apprendre à peindre sur un sac en toile de jute peut être une balade douce et satisfaisante. Ce tutoriel complet est une étape par étape accessible et enrichissante. À travers ce DIY, tu peux retrouver des astuces pour préparer la surface, choisir les peintures adaptées, et réaliser un motif qui parlera de ton univers.
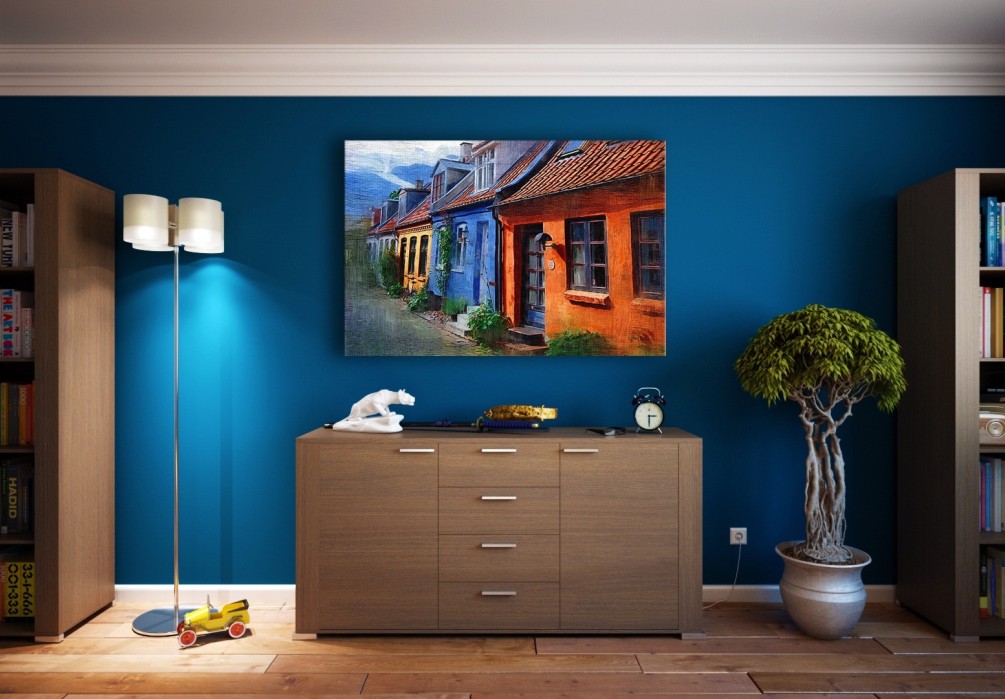
Découvrir comment peindre de façon graphique sur toile naturelle peut aussi s’accompagner d’une visite dans un univers comme celui de peindre un mur géométrique, où la rigueur des formes rencontre la douceur du décor. Ces inspirations offrent un écho parfait à la décoration slow living, douce et réfléchie.
Pour une ambiance plus végétale, pourquoi ne pas s’initier au DIY terrarium déco maison ? L’univers du vert et du naturel compose avec la toile de jute une symphonie pleine de fraîcheur et de simplicité. Ce lien est une source précieuse d’idées pour intégrer durablement la nature à ton quotidien : DIY terrarium déco maison.
Recycler et chiner pour un sac à bouteille éco-responsable et unique
Débusquer des matériaux pour créer un sac à bouteille en toile de jute, c’est aussi s’ouvrir aux joies du recyclage et de la chine. Dans un marché local ou une brocante, il est tout à fait possible de dénicher des sacs usagés, des chutes de textile ou encore des rubans naturels qui, combinés à un peu d’imagination, deviennent des joyaux créatifs. Ce travail de récupération fait écho à une démarche de consommation circulaire valorisée en 2026, invitant chacun à adopter un artisanat vertueux.
Le recyclage transforme un simple tissu en un objet chargé d’histoire. Chaque pli, chaque imperfection porte la mémoire d’un passé qui se réinvente dans l’instant présent. Par exemple, tu peux utiliser la toile d’un vieux sac de café pour créer un sac unique en son genre, chargé d’une valeur sentimentale et esthétique rare.
Voici quelques conseils pour bien chiner et recycler :
- Privilégier les marchés artisanaux : souvent riches en matériaux naturels.
- Explorer les salons du textile : un lieu où trouver des toiles de jute brutes.
- Interroger les boutiques zéro déchet : elles proposent parfois des tissus recyclés.
- Réutiliser des sacs publicitaires en toile de jute : une matière solide et économique.
- Transformer de vieilles tentures ou rideaux : pour une doublure colorée et recyclée.
En combinant ces astuces, tu construis un sac à bouteille qui ne ressemble à aucun autre, un témoignage vivant d’une créativité ancrée dans la conscience écologique.
Couture artisanale : comment intégrer la personnalisation et la fonctionnalité
La couture, au cœur de tout DIY sac à bouteille en toile de jute, se prête à de multiples variations selon l’usage envisagé. Que ce soit pour offrir un cadeau personnalisé ou créer un accessoire répondant à un besoin précis, les possibilités d’adaptation sont vastes. Miser sur des coutures renforcées, des doublures amovibles ou encore des poches intérieures enrichit la fonctionnalité tout en gardant l’élégance modeste du jute.
Les techniques artisanales permettent d’harmoniser le côté brut de la toile avec des finitions délicates. Par exemple, des anses en corde naturelle cousues solidement, associées à la douceur d’une doublure en coton biologique, confèrent à l’objet une identité forte et un toucher agréable. De même, choisir de rehausser les coutures visibles par des surpiqûres colorées instaure un détail raffiné, qui récompense le regard et valorise la fabrication maison.
Pour te guider dans cette démarche, voici un tableau récapitulatif des techniques et styles adaptés à la confection d’un sac à bouteille en toile de jute :
| Technique artisanale | Bénéfices | Idées de personnalisation |
|---|---|---|
| Couture main traditionnelle | Précision dans les finitions, solidité accrue | Broderies fines, petits messages cousus |
| Surpiqûres visibles | Effet déco, renforcement des coutures | Fil coloré contrastant, motifs géométriques |
| Anses en corde tressée | Esthétique rustique, ergonomie | Assemblage avec perles en bois, ajout de pompons |
| Doublure amovible | Facilité de nettoyage, polyvalence | Tissus imprimés, contrastes doux |
| Poche intérieure | Rangement pratique | Coloris ou tissus personnalisés |
Quelle est la meilleure toile de jute pour fabriquer un sac à bouteille ?
Il est conseillé de choisir une toile de jute épaisse, robuste, provenant idéalement de sources recyclées ou de sacs de café usagés pour garantir solidité et authenticité.
Peut-on laver un sac en toile de jute ?
Il est préférable de laver un sac en toile de jute à la main avec un savon doux et à l’eau froide pour préserver la fibre. Évitez le lavage en machine qui pourrait déformer ou fragiliser le tissu.
Comment personnaliser facilement un sac en toile de jute ?
Peindre à la main avec des peintures pour tissu, broder des motifs simples ou utiliser des tampons encreurs sont des méthodes accessibles pour donner une touche unique à ton sac.
Quel type d’anse choisir pour un sac à bouteille ?
Les anses en ficelle naturelle ou en tissu recyclé sont idéales pour allier confort, esthétique rustique et durabilité dans le temps.
Pourquoi privilégier la toile de jute dans une démarche slow living ?
La toile de jute est une matière écologique, biodégradable, qui s’inscrit parfaitement dans une consommation raisonnée, favorisant le recyclage et la fabrication maison à long terme.
Clara Rivière
Blogueuse déco passionnée par le slow living, Clara explore les façons créatives de décorer son intérieur avec des matériaux recyclés.


Vous pourriez aussi aimer

Quels accessoires pour une salle de bain design ?
Découvrez nos idées pour décorer un mur de photos
